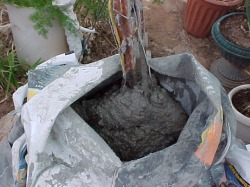
Have you ever admired statues in parks and wished it were possible to make some of your own? Your wish has been granted. All that is necessary is to understand the following instructions (which will not be easy). Oh, you'll also need supplies. Pre-mix cement (the cheap stuff), water (naturally), something to mix those ingredients in (also something to mix them with), rubber gloves would be nice and other stuff that I'll tell you about during the process. Now you might be wondering about how to form sloppy cement into anything that will resemble what you have in mind for your statue. The solution is ... inflatable swimming pool floats. There's a large variety. Sharks, whales, turtles, walrus, and more. Also to be considered are inflatable toys. Penguins, dogs, tigers, and more. Let the fun begin!
Tiger inflated
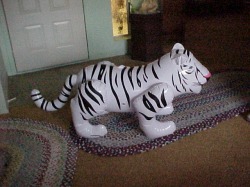
This is what it is hoped the statue will look like when it is done. Let the work begin with cutting the tiger open, from the base of its neck, to the middle of its back. Then working inside of it, cut away the plastic separating the body from the legs and tail. Forget the ears, they will have to be added to the animal later.
Tiger deflated
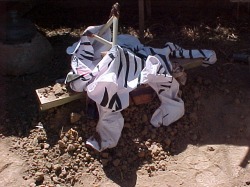
Now you have your tiger outside (no cement mess in the house, please) and he/she is propped up. This is necessary because the cement is heavy and can't possibly stay up without support. Here, there is a dirtpile, with a board on top for the tiger's tummy to rest on. Metal tubing was used to hold the body open, although that turned out not to be necessary.
Tiger getting filled
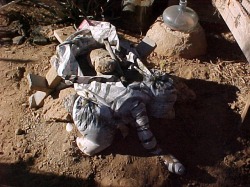
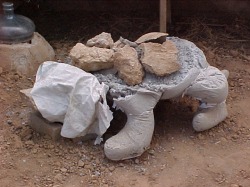
At this point soupy cement has been poured through the body opening into all four legs, and the tail. A layer of firm cement is also in the belly, with large rocks and pieces of cement blocks on top as filler. The rocks and blocks also help keep the cement from spreading out too much. The tiger is allowed to set.
Tiger needs a head
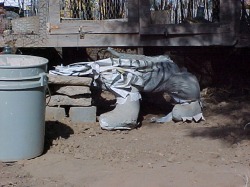
As you can see here, blocks have been placed under the head for supporting the wet cement. Also, as the legs set, the plastic was cut to allow air to speed up the drying process.
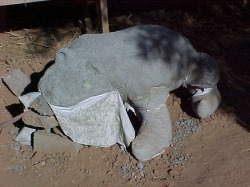
Tiger rocks
Once the legs and tail have dried, a lot of the plastic was removed. You can now better see the rocks that were placed on the first layer of tummy cement.
Yipe, tiger needs a head
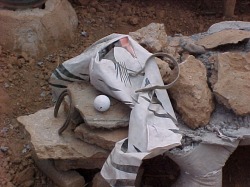
The head has been prepared for cement. Smaller rocks were used as filler, golf balls ready for eyes, horseshoe for fangs and fence post clamps ready to become ears.
Tiger drying
It took quite awhile to use cement the consistency of putty to form the body and head. Add a bit of cement here, moosh flat there, round out this shoulder, build up the thighs of both hind legs, make the muzzle wider and don't forget to put in the golf balls and horseshoe. The ears weren't easy, either. The tiger has to dry now.
Tiger dried and standing
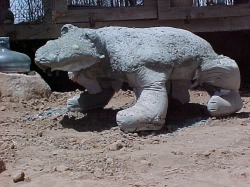
Tiger looks like he is huge, but he's really only two and a half feet tall. With the board and dirtpile carefully removed, we see success. He is able to stand sturdy. I've since sat on him, and he didn't crumble. LOL
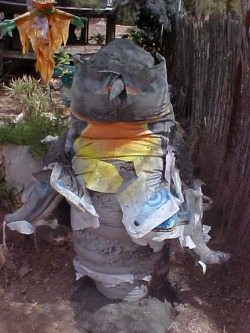
Grab the tiger by the tail
Tiger fanny. Yes, he isn't smooth like professionally made statues, but he is unique.
Tiger has become Leo
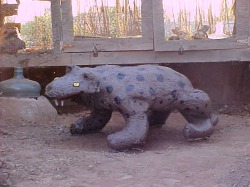
Since it wasn't possible to find the right colors of paint, Tiger became Leo, the mean looking leopard.
Pitiful Penguin
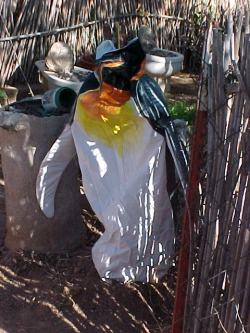
The next statue is to be a penguin. At this point the four-foot tall inflatable toy has had the plastic cut away between the body and wings. There is an iron T-post driven through him into the ground. Iron tubing is wired to the post, with the ends extending into the wings. Rocks are around the base of the post. We are ready for cement, and it will have to be soupy.
The mummy penguin

The plastic stretches, so he needs all the support he can get. Only the body has been poured, up to the armpits.
The headless penguin
After the lower body dried, soupy cement was poured into the wings, making sure they had something to rest the tips on. Otherwise the wings would have stretched clear to the ground. Then the chest was poured, using firmer cement. The top of the post is exposed, waiting for the head to be moulded.
It looks like he has a head now

Here he is from the back, partly peeled and drying. You'll notice the head appears to be nothing more than a lump.
Yup, there's his face
Surprise, he actually has a face. Since the beak is so narrow, several huge nails were used as supporting rods inside of it. Feet were added, since the original toy feet were too thin and looked dumb.
Penguin's wings are great

Another angle, and still drying.
A little paint works wonders

Chilly and his little friends. The small penguins were made from ice moulds. Those rubber mould can be removed from dried cement by peeling it carefully off. It can be used over and over again.
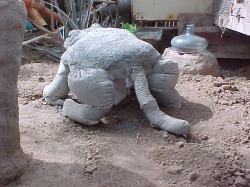
Where's the sea?
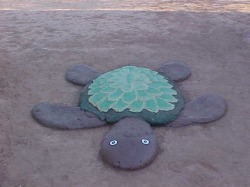
This sea turtle statue is low profile, but she is five feet long from nose to tail tip.
See you later, alligator
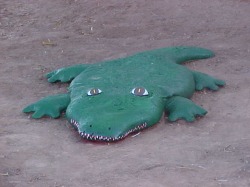
Alexandria is also five feet long.
Lazy dino
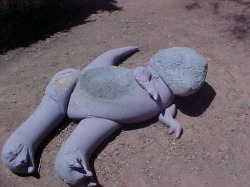
This is actually the first statue made. He is 13 years old. At that time I didn't know how to make them so they would stand up. Here, he still hadn't been repainted for this year. He has been quite a few colors in the past. Now he is gray, with black highlights and accents.
